

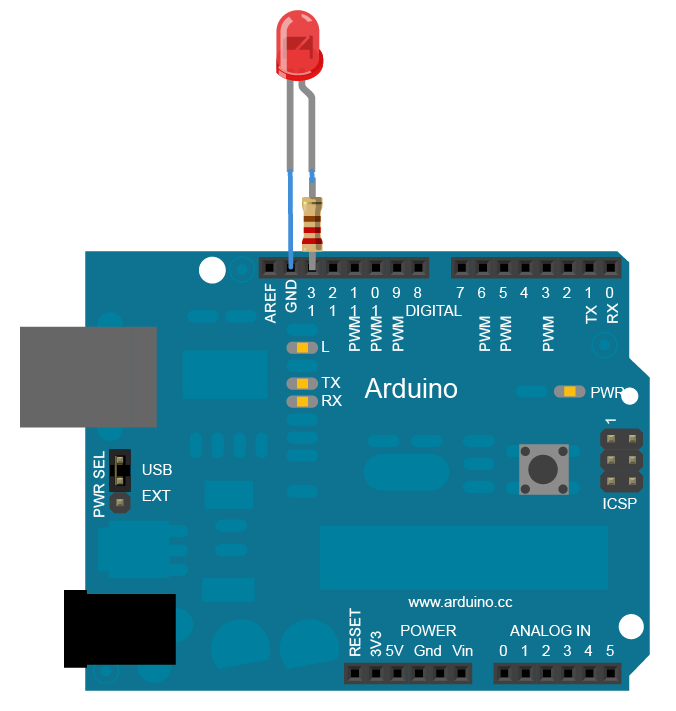
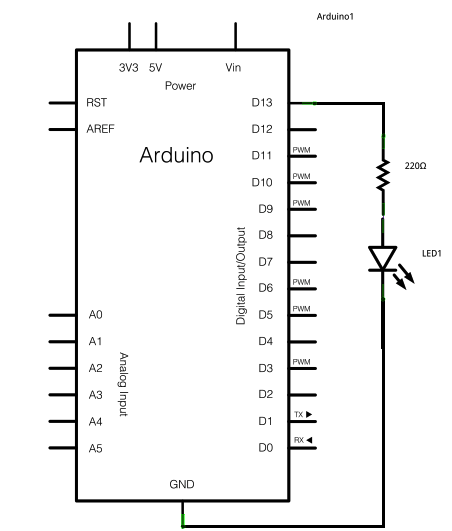
අවශ්ය උපාංග
- Arduino
- LED 1ක්
- 1K Resistor 1ක්
// set pin numbers:
const int ledPin = 13; // the number of the LED pin

// Variables will change:
int ledState = LOW; // ledState used to set the LED
long previousMillis = 0; // will store last time LED was updated

// the follow variables is a long because the time, measured in miliseconds,
// will quickly become a bigger number than can be stored in an int.
long interval = 1000; // interval at which to blink (milliseconds)

void setup() {
// set the digital pin as output:
pinMode(ledPin, OUTPUT);
}

void loop()
{
// here is where you'd put code that needs to be running all the time.

// check to see if it's time to blink the LED; that is, if the
// difference between the current time and last time you blinked
// the LED is bigger than the interval at which you want to
// blink the LED.
unsigned long currentMillis = millis();

if(currentMillis - previousMillis > interval) {
// save the last time you blinked the LED
previousMillis = currentMillis;

// if the LED is off turn it on and vice-versa:
if (ledState == LOW)
ledState = HIGH;
else
ledState = LOW;

// set the LED with the ledState of the variable:
digitalWrite(ledPin, ledState);
}
}
යාලුවො දකින්න ඇති අපිට අලුතෙන් Keyword එකක් අහු වෙලා තියෙනවා millis කියලා අන්න ඒ keyword එක හරහා අපිට ලබාගන්න පුලුවන් අගයක්. ඒ අගය ගණනය වෙන්නෙ මෙහෙම, Arduino එකට විදුලිය සැපයූ අවස්ථාවේ පටන් මිලිතත්පර කීයක් ගත වූයේද යන්න මෙමඟින් ලබා දේ. ඉතින් මෙතනදි currentMillis යන්නෙන් ඒ අවස්ථාවේ ගතව තිබූ කාලයත්, previousMillis මඟින් ඊට පෙර LED එක ක්රියාත්මක වූ අවස්ථාවේ ගත වූ කාලයත් සංසන්දනය කර ඒ දෙක අතර වෙනස interval එකට වඩා වැඩි වූ විගස එම සංසන්දනය (if condion) සත්ය වී LED එක Blink වේ, සුපුරුදු delay කේතයේදි දුන්නු පමාව මේ කේතයේදි interval හරහා ලබා දීලා තියෙනවා.
No comments:
Post a Comment